


Click the photo below to go directly to my download post, or continue reading my mumbo jumbo about why and how I created the knitting graphs!
Mumbo Jumbo:
I remember the night I did it. I was up until midnight and by the time I was done, my eyes were all glossy and I was exhausted, but had I set out to do something wonderful... and I succeeded! (at least I think so)
Talk about happiness! I went into the living room (after ignoring my Husband that evening) and told him what I had done and forced him to come to the computer to see my creation!!!
Since I have a small online knitting business creating knit pants for children, I often have had to duplicate stitch cute designs onto my knitting. In order for my designs to actually be "actual size" for stitching, I really needed a good design sheet where I could color in little "knit stitches". I didn't want to color in rectangles or squares (like regular graph paper)... I wanted to color in little, tiny, cute,"to scale" KNIT STITCHES!! Come on, it only makes sense, people!!!
I used to take regular graph paper, color in the areas and make the cutest little animals, faces, etc. but then once I stitched them onto the knitting, they looked completely wonky!!!
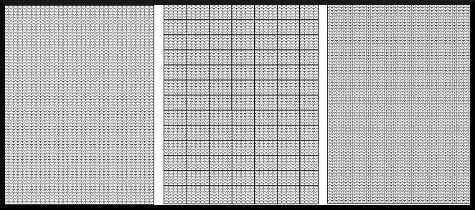
SO... in my photo editor, I literally cut out a knit stitch from a photo of my knitting. (I am going to TRY to remember exactly how I did it, but I really WAS tired, and I am amazed at how I actually figured out a little math that late at night!) I then had to figure out about how many stitches per inch I got when I knit with my favorite wool, Cestari Fine Merino. Then I made the little stitch to scale and used the "copy" and "paste" method to create a bazillion trillion of them onto a page the size of a piece of regular printable paper.
Then I realized I didn't have any guidelines. So I added some. Then I realized that I added them every 5 stitches, but on the right side that left only 4. Then I realized there was no way on God's green earth that I was going to try to figure out how to remedy that... so that is how they stayed.
THEN I realized that I also tend to duplicate stitch "half" stitches, to make more unique patterns. SO I had to "cut" each stitch in half in order to be able to color each little section differently!! I made the half stitches on the graph paper without guidelines, so that is what you end up downloading, and as soon as I have some spare time, I'll add guides and make that a downloaded paper too!
Once I was done, I was thrilled to find out that if I opened the document in my favorite FREE photo editor, Gimp, that I could color to my hearts delight!!!!
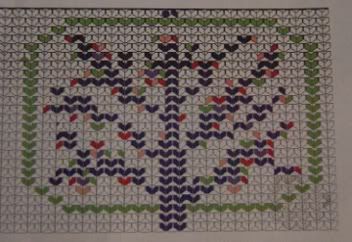
Here is an example of a pattern I designed for the back of my daughter's longies. It was the first one I designed using my own paper!

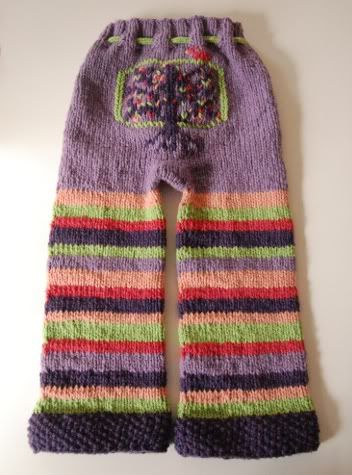
And here is the design stitched onto her longies...with some added roots, leaves and a bird at the top ;-)

Now you can design your OWN creations!!! ENJOY!!! And if you use my design, please share a link on your blog, facebook, Ravelry project, etc!
No comments:
Post a Comment